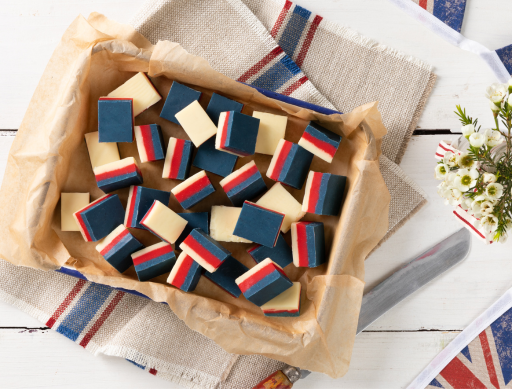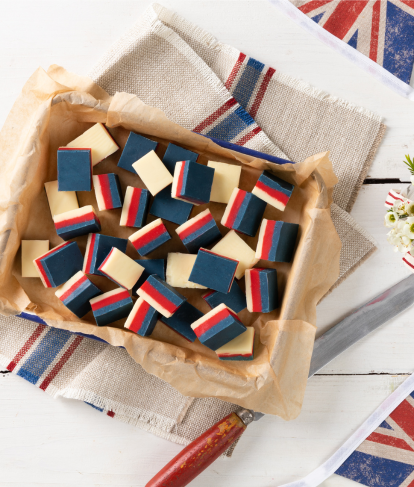
4th of July Fudge


A colourful twist on our white chocolate fudge. An easy three ingredient recipe with spectacular results!

White chocolate
Red & blue food colouring (we like the brightly coloured pastes!)
You will also need:
23cm (9in) square baking tin, greased and lined with baking parchment
Step 1 of 4
Break or chop the chocolate into small chunks and place in a non-stick saucepan with the condensed milk. Melt the ingredients gently over a low-medium heat, stirring occasionally until smooth and silky. (Alternatively melt in the microwave in 10-20 second bursts, stirring frequently).
Make sure to use a high quality concentrated food colouring to ensure the fudge colours are super bright. You can often find them online or from cake decorating shops.
Step 2 of 4
Add a third of the mix to the baking tin and level with a spatula. Separate the remaining mix into two bowls and add the food colouring (red in one bowl and blue into the other) making sure to mix it through thoroughly.
Step 3 of 4
Press the red fudge mix on top of the white layer, smoothing out into an even layer before adding the blue fudge mix on top.
For neater layers, divide the white chocolate and condensed milk into three batches and cook each colour layer separately rather than dividing the full amount into three. This takes a bit more time (and washing up!) but will give you three even layers of fudge.
Step 4 of 4
Chill the fudge for 1-2 hours or until completely set before cutting. The fudge will keep in the fridge for up to 2 weeks.
Have you tried making this delicious recipe yet?
Let us know by reviewing it below